
Automations
Rules that file new uploads into folders automatically.
2 min readLast updated 2026-07-30
Automations sort your uploads for you. Instead of moving files into folders by hand, you define a rule once and every matching upload is filed on arrival.
Create a rule
- Open Tools → Image Host → Automations.
- Choose Add rule.
- Pick the destination Folder the matching uploads should land in.
- Pick the Trigger — for example Mime starts with.
- Enter the Value it matches against, such as
image/orvideo/. - Save — a toast confirms the rule was added.
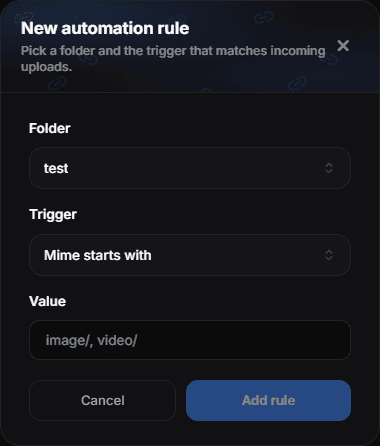
- Folder — where matching uploads land. It reads “No folders yet” until you create one, so make the folder first
- Trigger — what the rule tests — for example Mime starts with
- Value — what it matches against; the placeholder suggests image/ or video/
How rules are applied
Rules run when a file is uploaded, not retroactively. Files already sitting in your gallery stay where they are; move those manually once, then let the rule handle everything after.
Practical setups
- By purpose — profile assets into
profile, everything else intomisc. - By project — one folder per project or client, matched on how you name the files.
- By type — screenshots in one place, artwork in another.
Name files before uploading
Rules can only work with what the upload gives them. A consistent naming habit — banner-, avatar-, sc- — makes rules trivial to write and reliable in practice.
When a rule does not fire
- The rule was created after the upload. Rules are not retroactive.
- The file does not actually match — check the exact spelling, including case.
- The destination folder was deleted. Recreate it or point the rule elsewhere.
Managing rules
Rules can be edited and removed from the same screen. Deleting a rule leaves already-filed uploads where they are.